3D Printing of Chassis Frame
- Saurabh More

- Jun 6, 2020
- 4 min read
Updated: Jun 11, 2020
The idea of making a tubular chassis frame using 3D printing was motivated from the fact that I have fabricated an actual chassis frame for a Nation-level Go-kart Designing and Manufacturing competition. I was leading a team of 20 undergrads as vice-captain. Also, being the head of chassis department, I knew how much skilled human work is required for fabricating a chassis by the traditional method. As a result, it stroke my mind that if 3D printing was used for the same purpose, how much human work and time could have been saved. Thus, the idea of 3D printing a tubular chassis frame.
Proposal
Chassis frame is basically skeleton of the vehicle which holds all the parts together and nullify any external forces. It is required to be strong and firm.
Traditional Method
Traditionally tubular chassis frame is built in mainly two steps. The first step is cutting of the pipes. The pipes are to be cut in exact length as required according to the design. Also, the end profile of the pipe is specific as per the position and angle in which it is welded to the other pipe. This is a challenging and skillful work. The cutting of pipe is done by two methods, Manually or by using a CNC machine.

The second step is welding of the pipes. The pipes which are cut in specific profiles to fit with one another are welded together at the junction. The welding of the pipes is entirely manual and requires expertise in welding. There are various joints where many pipes are to be weld together. This type of welding require special skill set.

Once the welding is done, all the joints and pipes are to be grind for removing of any oxidized layer formed due to heating effect of welding, which is also done manually. Thus, traditional methods of fabricating a tubular chassis frame is a tedious job.
Drawbacks of Traditional Methods
The junctions of welded joints become stress concentrated areas. Thus, the strength of holding together against an impact at the joints weakens. This proves to be one of the major drawbacks of the traditional fabrication techniques for a tubular chassis frame.
Solution
The solution to these challenges and drawbacks is 3D Metal printing the entire chassis. 3D printing of the chassis will not only simplify the human work, but also give many advantages such as uniform stress distribution throughout the frame, thus, improving strength against impact.
Challenges of 3D Metal printing Chassis frame
The biggest challenge of 3D printing a tubular chassis frame is Support material. Being a pipe structure, it has many over-hangs that will require a lot of support material and to remove this support material will be a long tedious post processing work. To eliminate this, I turned to an emerging Israel based company called as ‘XJET’ which has a solution to this issue.

Method of 3D Metal printing
The method chose for 3D Metal printing of the part was ‘Nano-particle Jetting’ which was introduced by ‘XJET’. In this, the metal is not melted, instead, it is converted into fine Nano-sized particles, sintered and suspended into a liquid. This liquid is then used as an ink into a Multiple-nozzle arrangement and dropped on the building part in form of droplets. The collision of the droplets on the surface and the heat provided evaporates the liquid and the metal particles are fused together.


The solution for the support material is also solved by using this method. XJET’s NPJ technique comes with an arrangement where a layer of support material is printed along side the metal part wherever required. This support material is made up of a water-soluble material. Thus, after the part is built, the whole part along with support material can be placed in a water bath and the whole support material can be dissolved.
This helps in getting rid of the entire support material with minimal post processing work. This also will help to get a well finished end product.
Material used in this technique is Stainless Steel for the pipes and water-soluble PLA for the supports
Prototype Building
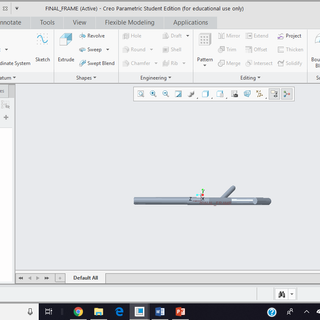
The prototype work started with designing a basic chassis frame for prototype model. For this, PTC CREO was used as a designing software due to its flexible and user-friendly designing interface. The requirement of the design was to create linear geometry which resembles with a Go-kart chassis frame. For this, the geometry of the chassis frame was created using ‘line’ command.

After the completion of the entire geometry the linear structure had to be converted into a tubular structure. For this, ‘Swept’ command was used.
Select the ‘Swept’ command and select the perpendicular plane which will consist the cross-sectional area of the pipe. Create the circular cross-sectional geometry for the pipes.

Select the path through which the geometry is to be projected. And the tubular structure is created. In the same way all the geometries can be done.


Once the part file was done, the .prt file was converted into .stl file by ‘Save as’ option, as .stl file is required for 3D printing format.

Simplify3D software was used to make the model in a printable format

Supports and rafts were added to the part using Simplify3D software

Total time estimated was 3h 42min
The printing of the part was done in a DREMEL printer at ETS. Material used in this was PLA. It took exactly 4h 12min to print the part


Conclusion
3D Metal printing proves to be a potential method for fabrication of a tubular chassis frame. The printed chassis is exactly the replica of the designed model minimizing the dimensional error, thus, improving the efficiency of the Chassis frame. From all the issues solved only one challenge remains is the size of the life-sized chassis frame which is more than the existing build platforms of printers available in the market. But for sure this problem will also soon be resolved. And in near future parts such as chassis frame can be manufactured using 3D Metal printing


Comments